Thursday, September 3, 2015

Havel's Fabric and Quilt Ruler Cutter

Havel's gave me a Fabric and Quilt Ruler Cutter to try. It's a rotary cutting ruler, with a handle for the rotary cutting blade built in.

Fabric & Quilt Ruler Cutter  by Havel's


I like it very much. I'm left handed, so the samples you'll see might look backwards, but I wanted to show you why I like it.

Although I have several Accuquilt strip dies, and love them, there are times when I want to use a rotary cutter and ruler.

 Normally, when I cut strips for a quilt, I "clean" off the raw edge across the width of the fabric, to set up for making strips that are perfectly straight. This involves laying the fabric on my cutting mat, lining up the ruler and making a small cut across the width of the fabric.

There are different ways of using rotary rulers, but I like to line up the cut edge of the fabric with the marking on the ruler that matches the strip width I want. In other words, the ruler is covering the fabric that I want to cut off, and the main body of the fabric is uncovered.  This is the way I learned about 28 years ago, I can do it quickly.


I want to clean off the right edge of this piece of fabric before cutting strips.


In this picture, the main fabric is to the left, with the strip I want to cut off just to the right edge of the cutter. This would be how a right hander would use the ruler to clean off the edge. I can do this too, because I don't have to HOLD the cutter, I can use my left hand to stabilize the ruler, and then my right to push the cutter along that metal edge.


Now I've cut the wobbly strip off, and I can proceed to cut the rest of my strips WITHOUT having to move the fabric. 


To cut the strips, I line up the edge of the fabric, here I'm using the 1 1/2" line, and run the blade up along the edge of the ruler. The ruler is covering  the 1 1/2" strip, making it stable while I cut. If you are right handed, you would be using the opposite side.


And here we have the cut strip. To cut more, I line up the desired width with the line on the ruler, run the cutter up the metal strip and I've got another strip.

You can do this with a regular rotary cutter and ruler, but you have to flip the fabric around between the cleaning off strip and the quilt strips. And you have to get some practice running the cutter along the edge of the ruler.

Here's a link to the ruler if you are interested


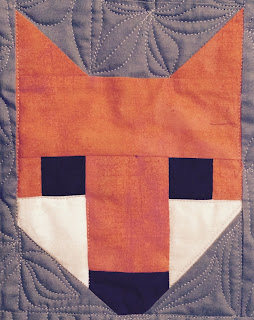
And here's the quilt I made: Fancy Foxes, from Elizabeth Hartman's pattern. The strips were going to be the noses, but I switched it to black which made for a better quilt, but not such a good tute.


Wednesday, July 15, 2015

Screen printing the easy way.

I really like these two gear shapes and I use them in some of my quilts.


 I am thinking of using them as my "vocabulary" to explore surface treatments, using them either as a stencil to paint through, or as a stencil to mark shapes on a quilt.

I have a screen printing kit from Stencil Pro. It makes pink stencils, with no chemicals. You print out the image for your stencil on transparency paper, lay it on top of the stencil paper, put it in the sun, count to 25, take it inside and soak it in water. That's your stencil. Pretty much.

If you have a thermofax, that's quicker. I had to wait until it was sunny, and had to count to 25, which took concentration, as my neighbor came home. Had to wave at him. A car was parking on the other side of the street with blinky lights on it's hood, had to stare at the car for a bit in case the inhabitants were up to shenanigans.  I still have no clue who they were. We live on a cul-de-sac in a suburb of Chicago, so normally people who park on your street and leave their hazard lights on are not strangers.


Here are the four stencils I ended up with. There was a learning curve, I wasted another four. and if I do these over, I won't have the boxes around the gear, just have the gear.

I'm going to pounce them with chalk to be a quilting guide. And put some fabric paint and paint through them, like a stencil. And I'm going to get my BERNINA to embroider them. And my cutting machines to cut them out. Maybe.

Anyway, the amazing thing to me, is that this kit from Circuit Bridge was purchased in 2011, and the sheets are still just as active. It's me that wasn't using them....

Here's a link to my crafts class if you want to see one way to use stencils for quilting. In the class, I use a 1" square grid stencil I bought at a quilt show, to mark a quilting grid.

www.craftsy.com/ext/RobbiEklow_5176_H


Saturday, June 13, 2015

We're having ANOTHER drawing for my Craftsy class for free! The winner will be drawn on June 21, the night before the class launches on June 22.

Here's the link:

http://www.craftsy.com/ext/RobbiEklow_Giveaway

And for your entertainment, a few pictures of my latest quilt:


Monday, June 1, 2015

Craftsy!!

I've got a class coming up on Craftsy!!!! I'm really excited.

Here's a link to sign up for a giveaway, one winner will get the class for free.
The class if Fearless FreeMotion Quilting. I'll show you how I use felt samples to make it easier to practice free motion quilting on my Bernina. It's a great way to get started if you haven't free motioned before. I've been using this method for years in my "bricks and mortar" classes. (or is that flesh and blood? I don't know...)

http://www.craftsy.com/ext/RobbiEklow_Giveaway